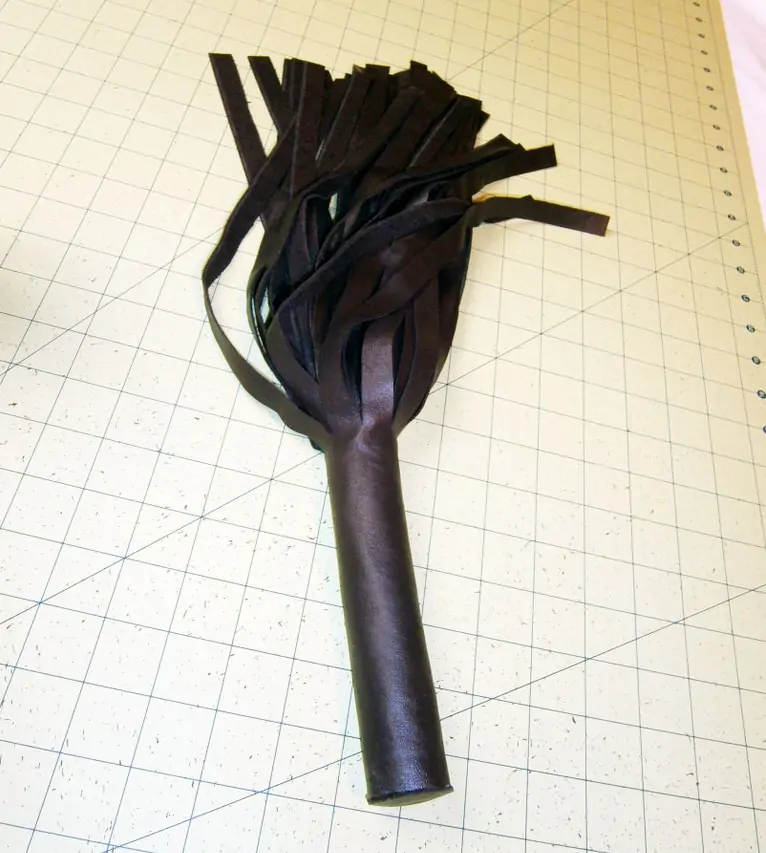
Calling all tops, bottoms, switches, and crafty kinksters! Are you looking to add a deeply personal touch to your play? Perhaps you want a specific weight, a unique sensation, or simply the pride of using a tool you made with your own hands. Today, we’re diving into the art of DIY BDSM gear by creating a classic beginner-friendly DIY flogger.
Crafting your own implements isn’t just cost-effective; it’s an intimate part of your D/s dynamic. The process itself can be a form of devotion, and the final product is tailored precisely to your desires for thuddy or stingy sensations.

A Crucial Disclaimer: Safety & Consent First
Before we begin, remember the golden rules: RACK (Risk-Aware Consensual Kink) and SSC (Safe, Sane, Consensual). This guide is for educational purposes. You are responsible for the safety and integrity of your creation. Always test your DIY tools on an inanimate object first and negotiate all scenes thoroughly with your partner(s). Quality control is your responsibility.
Materials You’ll Need (Your Shopping List for Sensation)
The Falls: This is the business end of your flogger—the strands that make contact. Popular choices for beginners include:
⦁ Soft Suede Leather: Provides a deep, thuddy sensation.
⦁ Deerskin or Elk Hide: Incredibly soft, great for warm-up and sensual impact play.
⦁ Vinyl or Upholstery Leather: Offers a sharper, more stingy feel.
⦁ Quantity: For a medium-sized flogger, you’ll need a piece about 18″ x 8″ (45cm x 20cm).
The Handle: This needs to be solid and comfortable to grip.
⦁ A wooden dowel (around 1″ thick and 10-12″ long) is perfect.
⦁ You could also use a section of a broomstick or a sturdy plastic rod.
The Core Components:
⦁ Strong adhesive (Barge Cement or a similar leather/contact cement is ideal).
⦁ A sharp utility knife or rotary cutter.
⦁ A metal ruler.
⦁ A self-healing cutting mat or a safe cutting surface.
⦁ Strong thread (waxed linen thread is excellent) or artificial sinew.
⦁ An awl or needle for punching holes.
⦁ Sandpaper (to smooth the handle).
Step-by-Step Guide to Building Your Impact Toy
Step 1: Prepare the Falls (Cutting the Strips)
Lay your leather flat on the cutting mat. Using the ruler and utility knife, cut the material into long, even strips. The width will determine the sensation:
⦁ Wider strips (3/4″ to 1″) = More thud.
⦁ Narrower strips (1/4″ to 1/2″) = More sting.
Aim for 30-50 falls for a full, satisfying flogger. Take your time here—straight, even cuts are key to a professional look and balanced swing.
Step 2: Craft the Comfortable Handle
Sand your dowel until it’s smooth to prevent splinters. You can leave it natural, stain it, or wrap it with paracord or leather cord for a better grip. This is your chance to personalize the tool’s aesthetic.
Step 3: Create the “Knot” or Core (Assembly)
This is the most critical part for durability.
- Stack the Falls: Gather all your leather strips and align them perfectly at one end.
- Apply the First Glue Layer: Spread a generous amount of cement on the top inch of the stacked falls and wrap them tightly around one end of the handle. Use rubber bands to hold them in place as the glue dries (follow the cement’s instructions).
- The Wrap-and-Knot Method (Traditional): Once the glue is dry, take your strong thread or sinew. Leave a long tail, and start wrapping the glued section as tightly as humanly possible. This creates the flogger’s “head.” After several tight wraps, tie a secure knot. For extra strength, look up a “Chinese Crown Knot” tutorial—it creates a beautiful and functional finished end.
Step 4: Final Touches & Personalization
Your basic flogger is now functional! But let’s make it yours.
⦁ Trim the Falls: Even out the ends of the falls if they are uneven. You can cut them straight across, or at an angle for a different look.
⦁ Condition the Leather: Use a leather conditioner to keep the falls supple and prevent cracking.
⦁ Add Embellishments: Consider adding a lanyard or wrist strap to the end of the handle. You can also add decorative knots or even lightly burn the tips of the falls for a unique look (do this in a well-ventilated area!).
Ready for Your Next BDSM Scene
Congratulations, you’ve just crafted your very own instrument for sensation play! Before introducing it to a partner, test it on a pillow or your own thigh to understand its weight and feel. Is it thuddy like a deep massage, or does it have a sharp, stingy bite? Communicate this to your sub or bottom during negotiation.
The beauty of DIY is in the customization. Want a heavier thud? Use thicker leather or add more falls. Prefer a wicked sting? Make your next one with thinner strips of rubber. The possibilities are endless.
Have you made your own flogger? Share your tips and experiences in the comments below! And remember, stay safe, consensual, and creative in all your kink explorations.